Planificateur d'observations
Kristian Ivanov
Depuis KDE SC 4.4, le travail de Prakash Mohan durant les « Google Summer Of Code » a été intégré dans KStars. KStars possède maintenant un incroyable planificateur d'observations pour organiser les sessions d'observations. L'option Session d'exécution vous permet d'enregistrer des informations à propos des objets pendant que vous les observez. Alternativement, vous pouvez aussi écrire un court journal dans le planificateur de session lui-même. Nous vous souhaitons beaucoup de plaisir à planifier vos observations avec KStars !
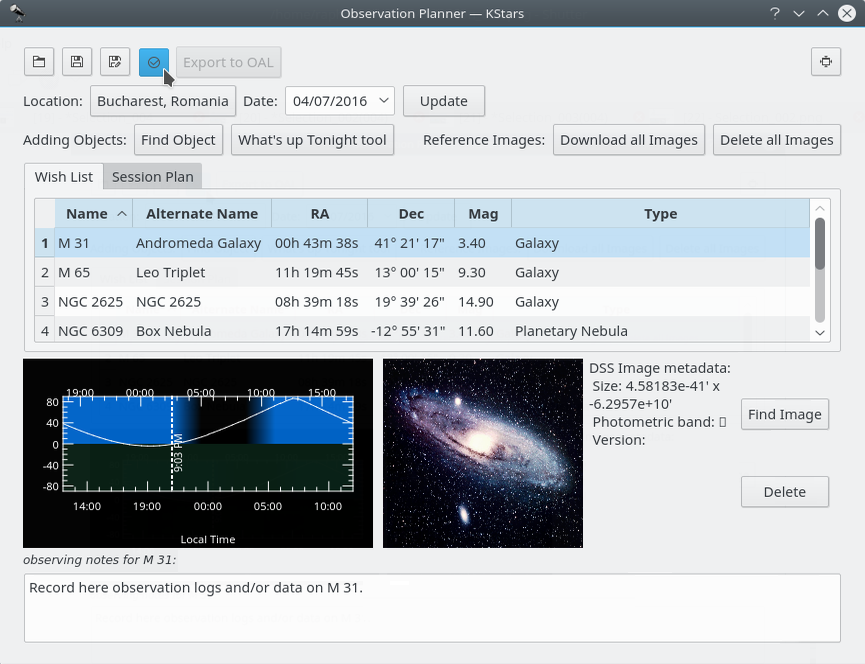
Vous pouvez même ajouter des images aux objets. La liste d'images est une liste de recherche d'images de Google. Pour ajouter une image à un objet, tout ce dont vous avez besoin est d'appuyer sur le bouton
Chercher une imagesur votre droite et ensuite de trouver l'image que vous souhaitez. Si vous n'avez pas de connexion Internet, vous pouvez ouvrir une image enregistrée sur votre disque dur. Veuillez noter que les images que vous allez utiliser seront rognées à 600 x 600 pixels.La première façon de procéder est d'appuyer sur Ctrl+2 ou Ctrl+L pour ouvrir la liste d'observation, puis d'appuyer sur le bouton
Ajouter un objet.
Le bouton
Télécharger toutes les imagesexécute une recherche d'images SDSS et affiche l'image DSS si les coordonnées AD/DEC sont en dehors de l'empreinte SDSS.
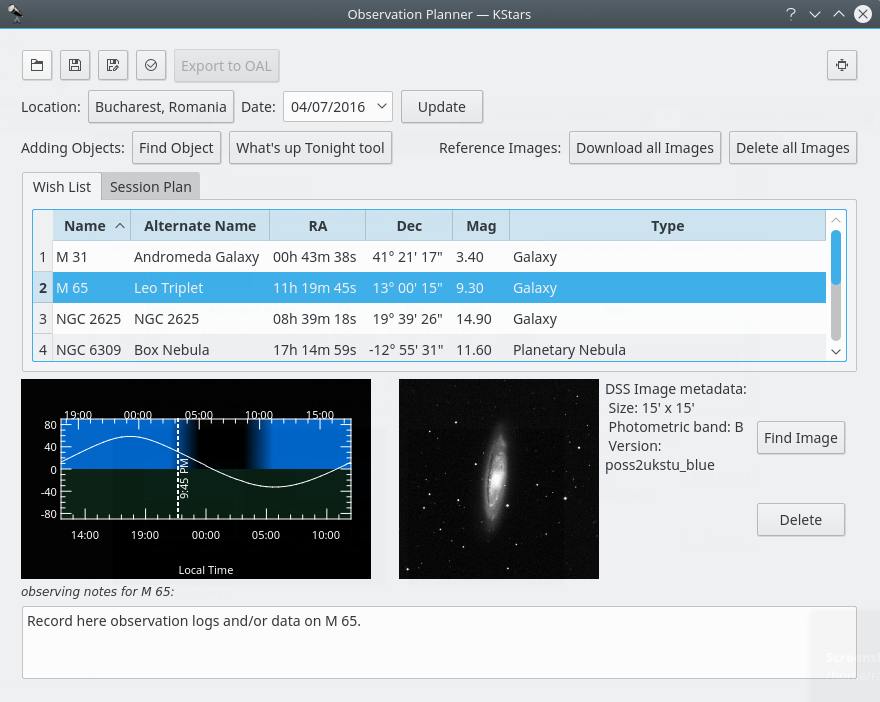
Ceci est une image SDSS de la galaxie
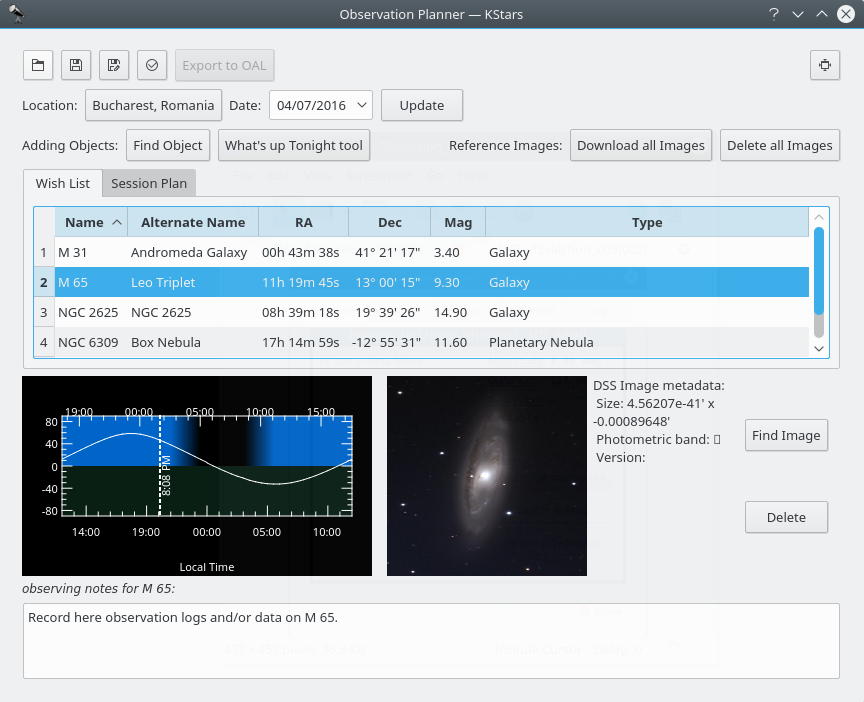
Ceci est une image DSS de la même galaxie
Le bouton
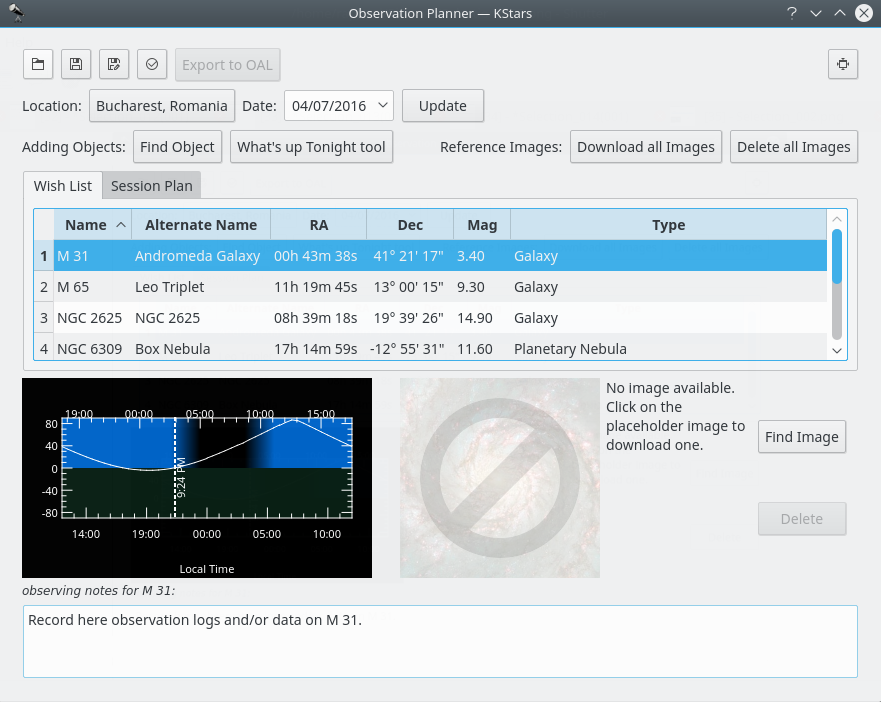
Supprimer toutes les imagesréalise exactement le contraire. Il permet de supprimer toutes les images téléchargées.
L'image de la galaxie est maintenant supprimée
Vous pouvez ajouter plus d'objets en appuyant sur le bouton
Chercher un objet. Cela ouvrira l'outilChercher un objetqui fournit deux méthodes précises pour filtrer les éléments selon plusieurs critères. Vous pouvez filtrer la liste des objets par type : Quelconque, Étoiles, Système solaire, Amas (globulaires ou ouverts), Nébuleuses (gazeuses ou planétaires), Galaxies, Comètes, Astéroïdes, Constellations, Supernova ou encore Satellites. Vous pouvez aussi filtrer par nom. Indiquez le nom de l'objet souhaité dans la boîteFiltrer par nom.Dans la fenêtre du planificateur d'observations vous verrez le composant graphique « Altitude selon l'heure » (AltvsTime) montrant comment l'altitude d'un objet varie avec le temps.
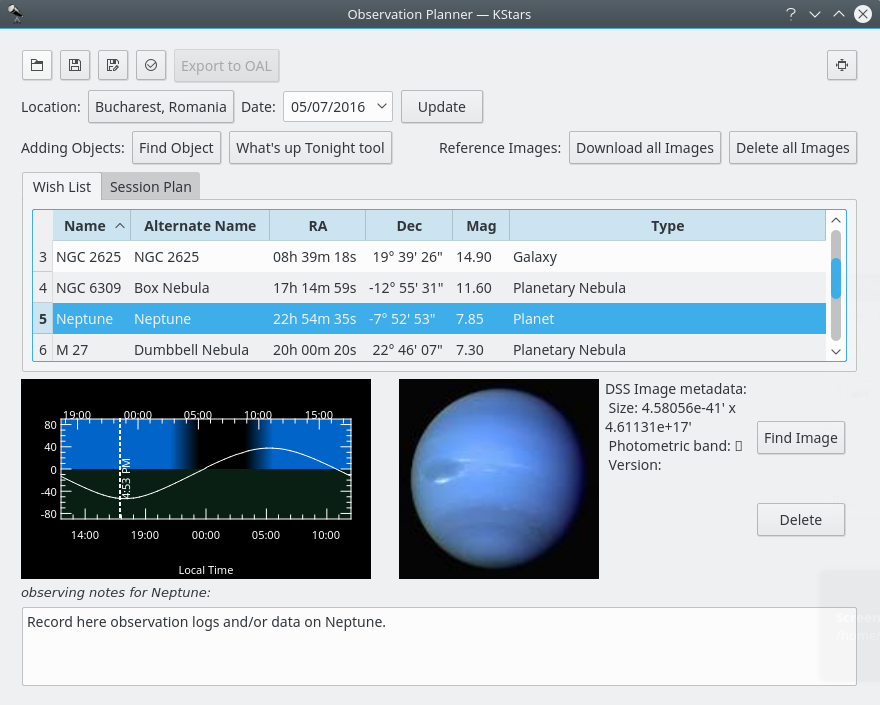
Sous le composant graphique « AltvsTime », il y a une zone de texte dans laquelle vous pouvez ajouter des notes d'observations pour un objet courant du ciel.
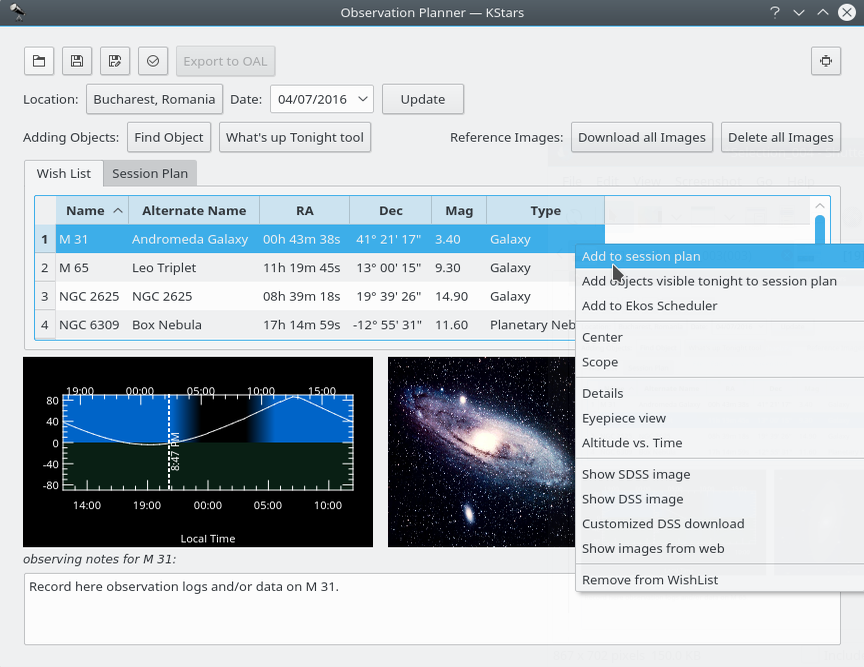
Veuillez noter que la liste de souhaits n'est pas le plan de session. Dans la liste des souhaits, vous pouvez ajouter des objets que vous souhaitez observer à un certain moment. De là, vous pouvez les ajouter dans le plan de session.
Vous pouvez voir la fenêtre contextuelle apparaissant en faisant un clic droit sur un objet.
Ajouter des objets à la fenêtre du plan de session
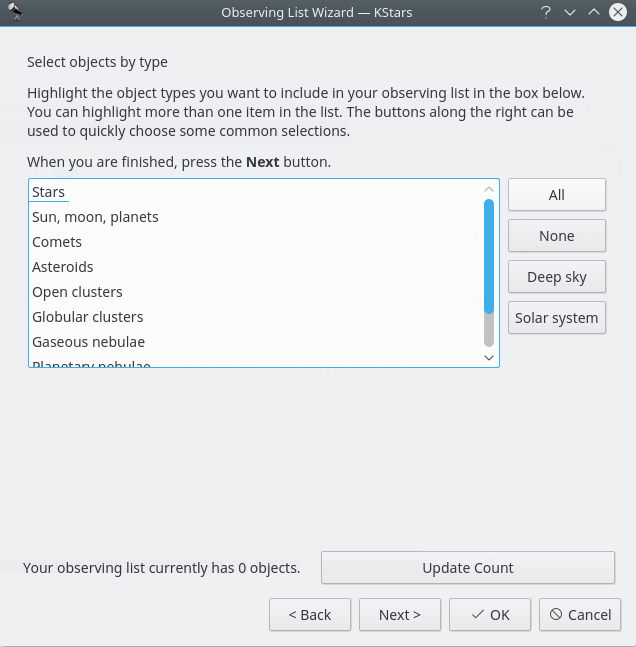
Voici la deuxième méthode pour ajouter des objets dans votre planificateur d'observations, en utilisant l'assistant de liste d'observation. Vous avez juste besoin d'appuyer sur la quatrième icône dans le coin supérieur gauche de la fenêtre du planificateur d'observations.
Bien que semblant différent, cette méthode est fondamentalement identique à la première. Cependant, elle peut être un peu plus détaillée. Vous pouvez voir ici les mêmes catégories d'objets.
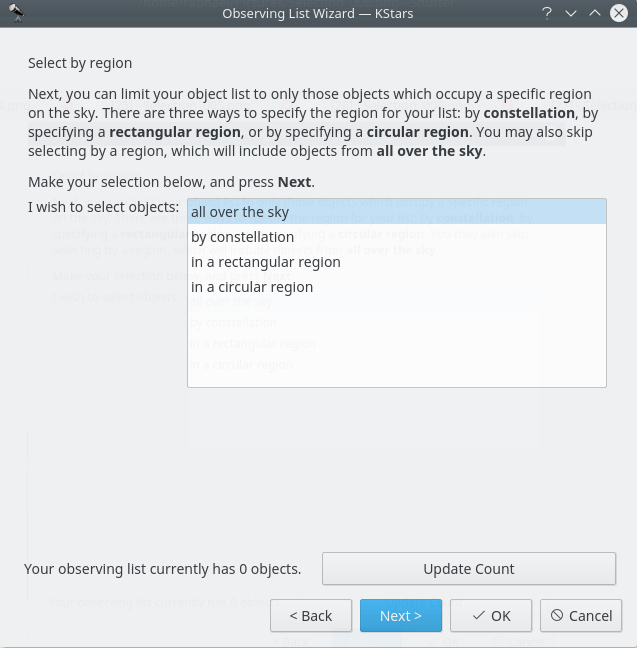
Vous pouvez choisir où les objets doivent être dans le ciel. Il y a quatre options disponibles pour vous : le ciel en entier (le mode par défaut), par constellation et dans une région (rectangulaire ou circulaire).
Vous pouvez choisir la date de l'observation et l'endroit où vous allez faire vos observations.
Vous pouvez choisir le seuil de magnitude pour les objets qui doivent être affichés. En astronomie, la magnitude absolue (connue aussi comme magnitude visuelle absolue quand elle est mesurée dans la bande photométrique standard V) mesure la luminosité intrinsèque d'un objet céleste.
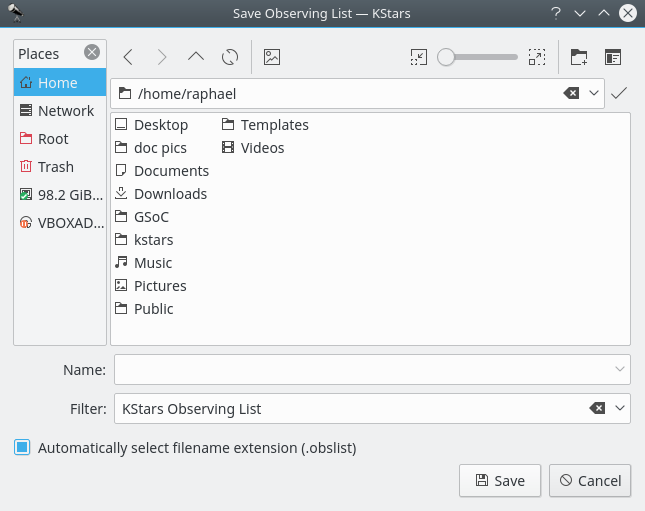
Vous pouvez enregistrer votre plan d'observation. Et cela l'enregistrera avec une extension
.obslist.
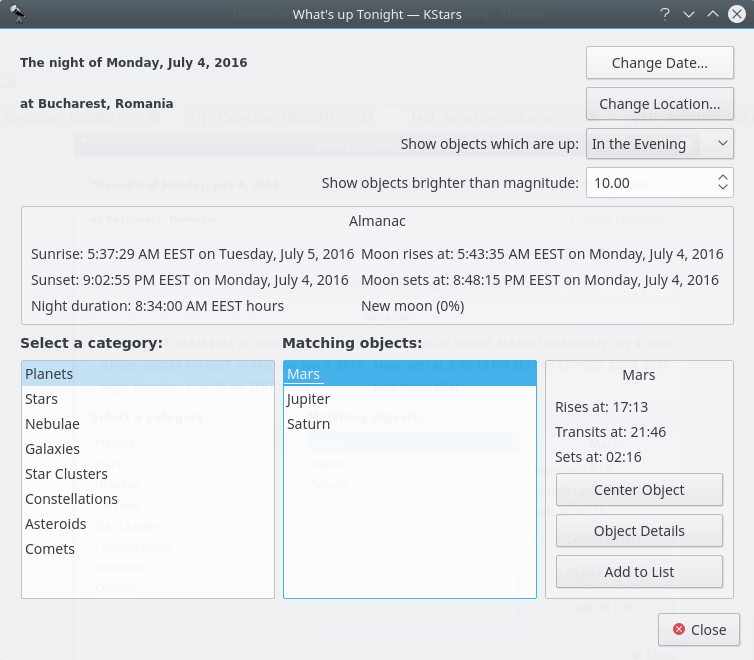
Vous pouvez aussi accéder au
DCN(Dans le ciel cette nuit), qui peut être d'une grande aide pour vous. Il vous donne des idées sur quoi observer à une date, une heure et une position que vous spécifiez en utilisant les boutons de configuration dans le coin supérieur droit de la fenêtreDans le ciel cette nuit.
Une autre manière d'ajouter des objets à votre plan d'observation est d'utiliser la nouvelle fonctionnalité
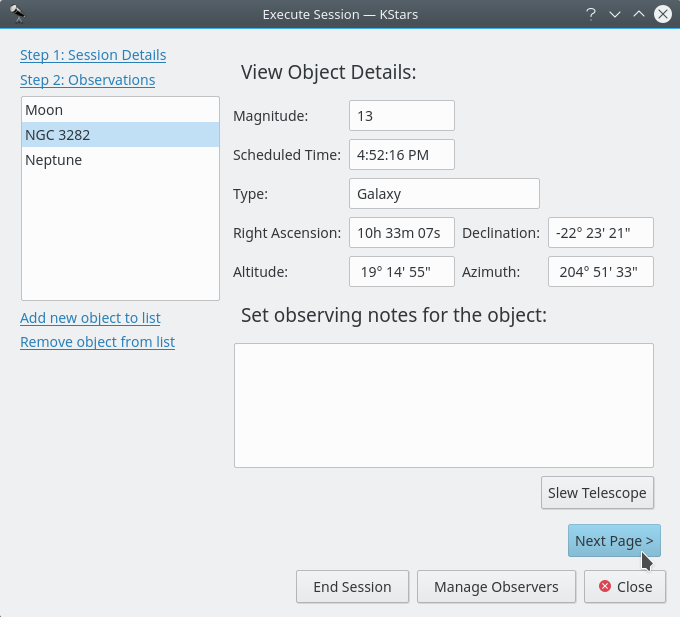
Ajouter un traitement par lotsqui ouvrira une boîte de texte où vous pouvez saisir autant d'objets que vous le souhaitez qui seront ajoutés d'un coup à votre plan d'observation. Tout objet qui ne serait pas déjà dans KStars sera cherché dans la base de données astronomique « SIMBAD » (à condition d'avoir été activée dans la configuration) et ajouté dans la base de données. Toute cette procédure d'ajout d'objets est lente et peut prendre du temps et vous pouvez voir son avancement dans la barre d'état. Tout objet impossible de trouver sera listé dans un message d'erreur afin de pouvoir l'identifier et le corriger. C'est généralement dû à un problème de nomenclature non géré par SIMBAD (c'est-à-dire Sim 147 plutôt que Simeis 147). Cette nouvelle fonctionnalité vous permet de facilement réutiliser une liste trouvée sur le web afin de l'ajouter à votre flux de travail dans KStars.Voici à quoi ressemble la fenêtre
Session d'exécution. Elle peut être ouverte par un appui sur Ctrl+2. A l'intérieur, vous pouvez aussi voir quelques informations sur l'objet sélectionné et vous avez la possibilité d'ajouter des notes d'observation.
Première fenêtre pour la session d'exécution
Un appui sur le bouton
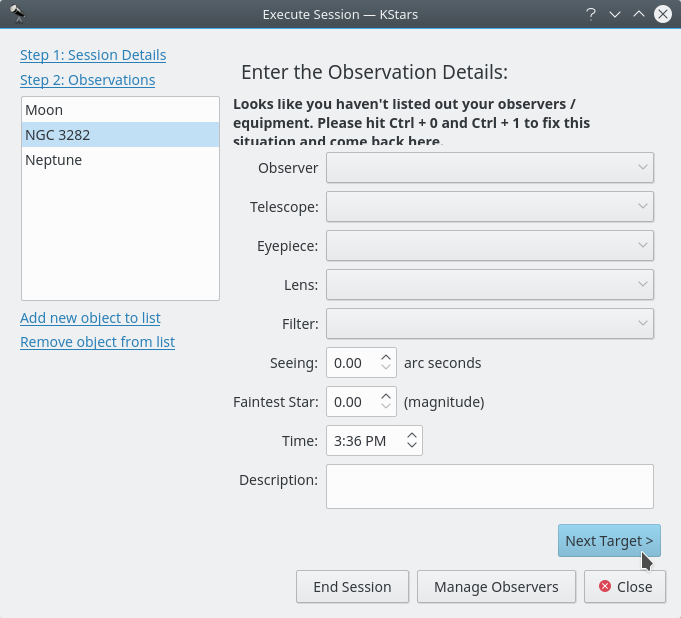
Page suivantevous permettra d'accéder à la seconde page du plan de session. Vous avez la possibilité de voir ici les informations, non pas relatives à votre objet mais relatives à votre équipement.
Seconde fenêtre pour la session d'exécution
Un appui sur le bouton
Nouvelle ciblepermettra à la session d'exécution d'ouvrir la première fenêtre relative au prochain objet.